Quick installation, easy integration

Installing our single-depth sensors takes less than a minute.

Accessing the data is easily done via the Senosterra app or integration with our Open API.

If you want to integrate sensor data into another application, the process is straightforward and can greatly enrich your data dashboards.

Sensor Installation in 6 Easy Steps

Getting started with your sensors is simple. There are 6 easy steps to follow to feel the benefits of the system and begin making data-
driven decisions.

Repeat steps 1 and 3 for additional sensors. After 1 hour check the Sensoterra app or login to the web monitor for soil moisture data. If the wake-up step is missed, it can take up to 48 hours to connect.

For our single-depth sensors, you can push or hammer these into the ground in less than a minute.

Having good soil contact and knowing your soil composition are the two most important things while installing your sensors.

During the set up in the app take care to choose the most relevant soil type from the drop-down menu.

With proper use and care, the sensors should last 3 years. To get the most out of your sensors, please keep these tips in mind:

Soil contact is important so should you feel an obstruction or resistance beneath the ground, try to find another spot to place the sensor.

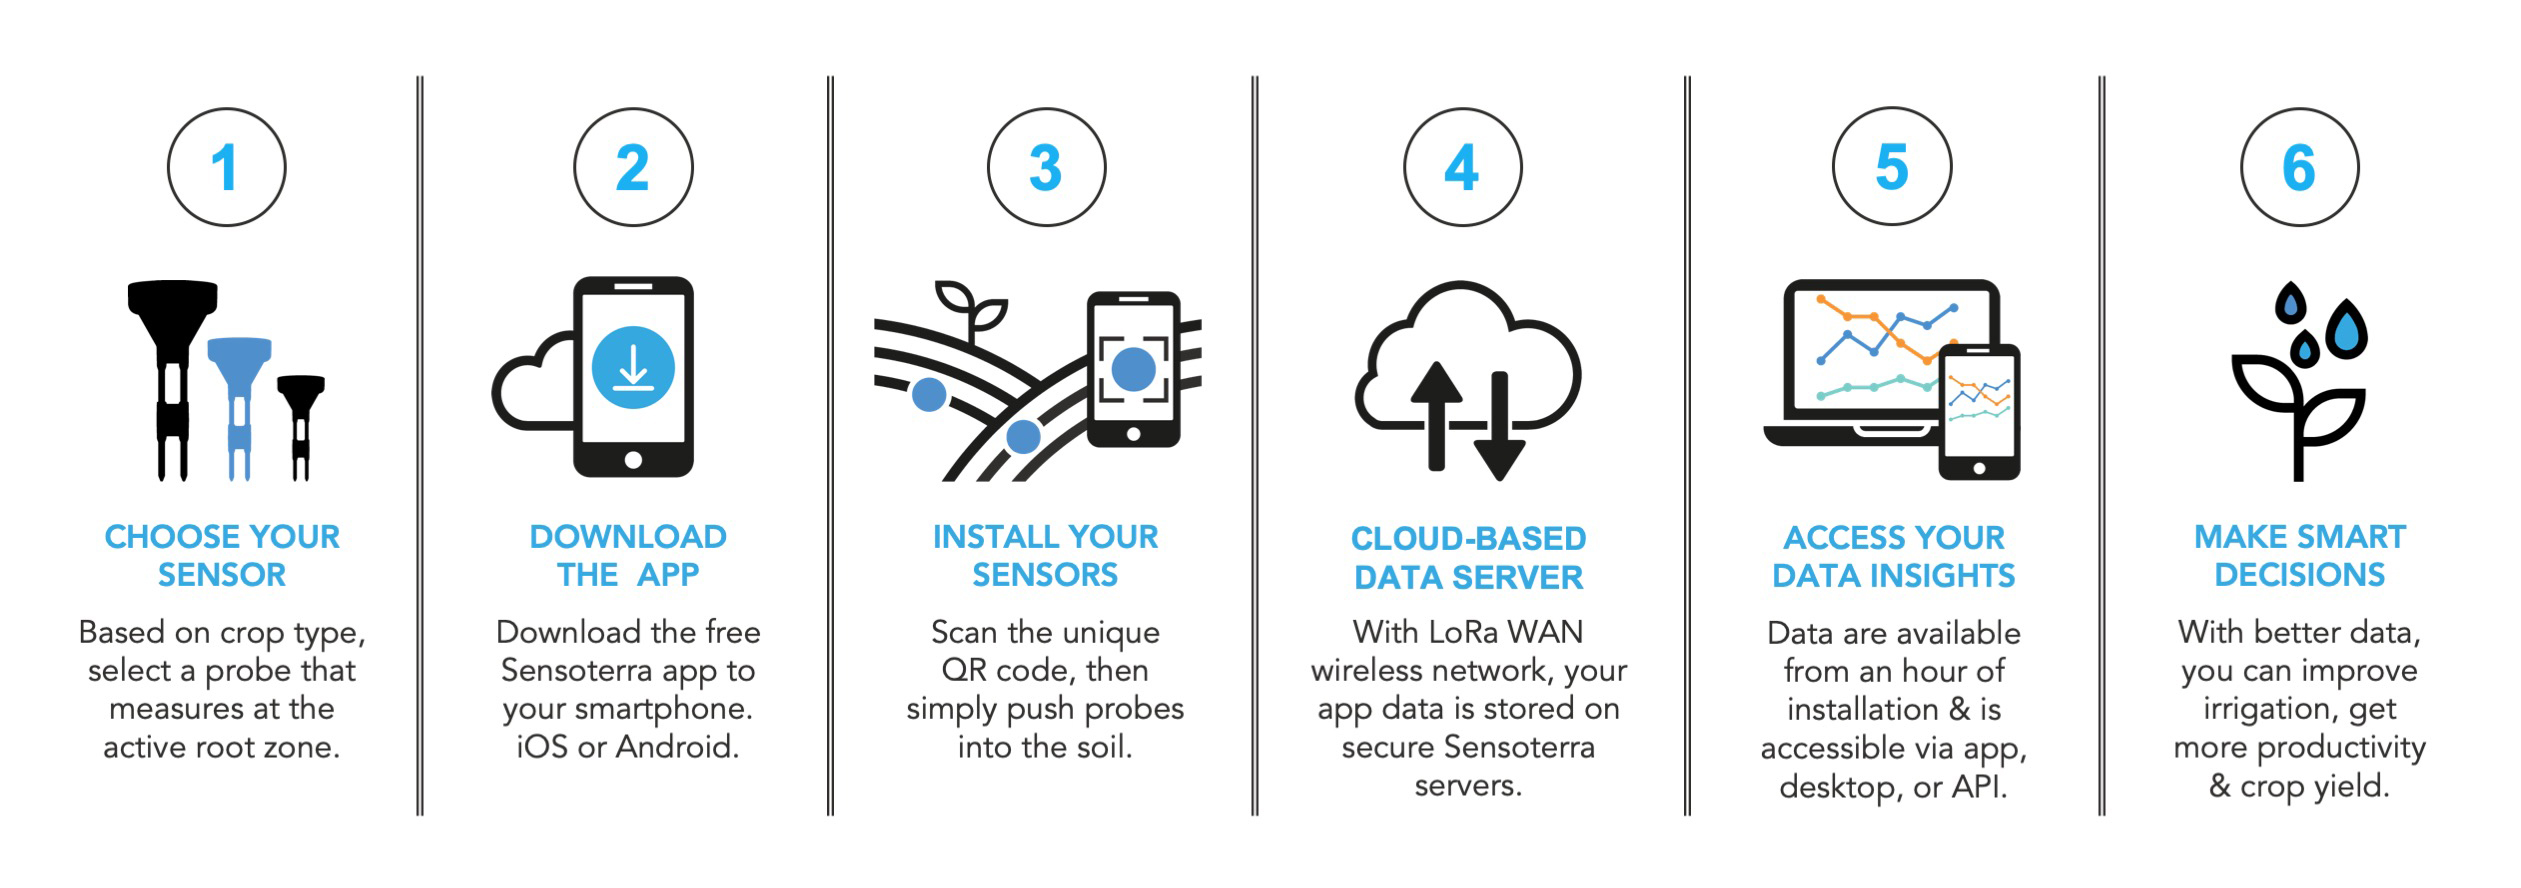
Placement of sensors is key! Place sensors in a general line of sight of the gateway. Do not place sensors near any large (metal) structures like a grain silo, electricity tower, or water tower.

The default setting is for measurements once per hour. It is possible to increase the frequency, however this uses more battery and will decrease the expected life.

Moving a sensor to a new location is easy If you want to move a sensor to a new location, repeat steps 3 through 5. Make a note of the sensor you are moving so you are aware when reviewing the data. The sensor is locked to the first user account the sensor is linked to, which means you cannot add the device to another account. This is a protection feature in case someone else tries to access your data.

To maximize your battery life when not in use, remove the sensors from the ground and store them upside down in a dry place. This is particularly important when your gateway is turned off. Do not leave the sensors in the soil with no LoRa coverage. For more information see our SD Installation guide

Sensoterra Installation Guide v1.3.pdf

Access the data way you want to use it

Accessing the data is easily done via the Sensoterra app or monitor site

Sensoterra Sensors Work in All Soil Types

Sensoterra sensors work in all soil types. However, the accuracy and precision of the soil moisture data can be improved when the soil type is known. We call this "Calibrating the data".

Calibration is needed because of soil feature variations, such as soil composition, organic matter content, and salinity.

Choose the Right Soil Calibration Curve During Sensor Installation

After installing your probes, the soil type needs to be set up in the Sensoterra app. It is important to choose the most compatible soil type for your field in order to receive the most accurate soil moisture measurements.

At the Sensoterra app, there are two options to access the calibrated data and choose the appropriate soil type:


(1) Installation of new probes: Add a new device -> Scan QR code -> Set up probes location -> Details -> Soil -> Select a soil type

(2) Changing existent soil type settings: Probe -> Probe details -> Edit -> Soil -> Select a soil type.

Data Calibration Coverage and Soil Type

All soil types covered by Sensoterra sensors are listed, with specific information on the info button. Users can choose between:

  • Sand: Contains the highest portion of sand, with low levels of silt and clay.
  • Sand (Planting soil): Planting soil is a sub-classification of sandy soil - predominantly composed of sand (>50 µm), and low levels of silt (<10%) and clay (1%).
  • Sand (Tree soil): Tree soil is a sub-classification of sandy soil - predominantly composed of sand (>50 µm), and low levels of silt (>10%) and clay (1%).
  • Sand (Dunes soil 1): Predominantly composed of sand (89%), with lower levels of silt (6%) and clay (2%).
  • Sand (Dunes soil 2): Predominantly composed of sand (93%), with lower levels of clay (<1%) and organic matter (2%).
  • Loam (Greenhouse soil): Contains 16% of clay, 35% silt, and 34% sand.
  • Loamy sand: Predominantly composed of sand (>50 µm), with varying amounts of silt and clay.
  • Clay: Contains 40% or more clay, with sand (35-45%) and silt (less than 40%).
  • Clay loam: Contains around 30-40% of clay and 20-45% sand, with lower levels of silt.
  • Clay loam silt: Predominantly composed of silt (2-50 µm), with similar levels (30-35%) of sand and clay.
  • Saline clay: Clay soils with high saline levels (chemical conditions) due to inputs application.
  • Peat: Peat basically contains organic matter and hardly any mineral particles like sand, silt and/or clay.

* Sensoterra sensors have their data calibrated for the most common soil types in the market, indicated in the soil texture diagram (in blue).